When you start a blog on BlogSpot.com, you usually get a domain name like (name.blogspot.com) and this is what we call as a free domain name. Where as custom domain name is something like name.com. A good example is BlogSurf.net which is a custom domain name.
Guide to Setup BlogSpot With your Custom Domain Name:
- Your BlogSpot blog up and running
- You have access to your domain name
Add Domain Name To Your BlogSpot Blog:
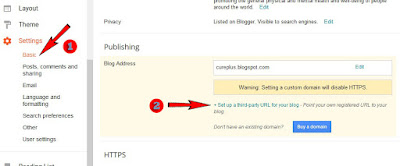
First login to your BlogSpot dashboard, and head over to Settings > Basics and you will see an option which says Publishing >Blog address > + Setup a 3rd party URL for your blog
Here you need to add the domain name that you have purchased, and after adding the domain name, it will give two CNAME records and 4 A records which we will be needing in the next step.
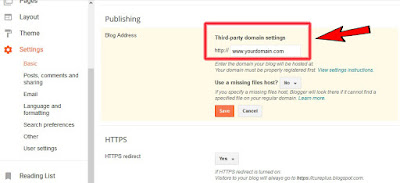
Click on + Setup a 3rd party URL for your blog, and add the domain name which you have purchased.
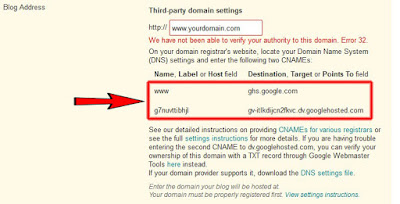
Once you have added the domain name with www, you will see an error saying “We have not been able to verify your authority to this domain. Error 12..” and you will get the CNAME record that you need to configure (See below screenshot)
Now. once you have these CNAME details, it’s time to login to your domain control panel, and make changes.
Setting up CNAME and A Record for BlogSpot Custom-Domain Name:
- Click on the domain name which you have purchased inside your dashboard, and you will be on Manage domain page.
- On the next page, click on DNS zone file to start adding the record.
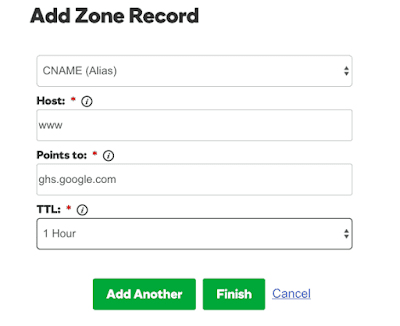
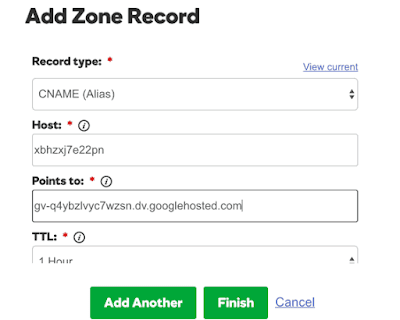
- Click on Add record & from the pop-up select CNAME record & add both the record one by one from your BlogSpot setting screen. Here is both the image to make it easy for you to understand the setup.
Click on finish & on the next page you need to click on Save changes.
Adding A records to your Domain DNS:
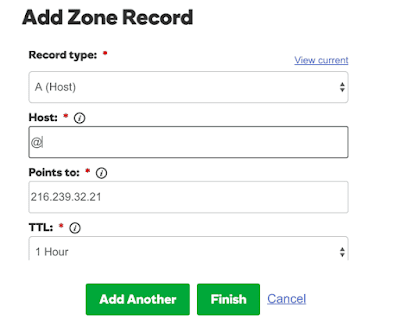
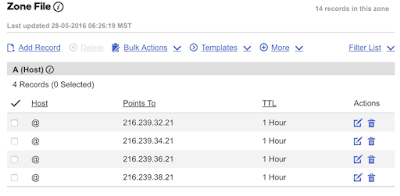
This is the last step where you just need to add 4 I.P. Address into your A record. The process is going to the be the same as above, all you need to do is add A record instead of CNAME. I’m sharing one screenshot which will show you how to add A record, and similarly you can add all 4 A records.
- Click on Add record, select A name under record type. In the Hostname part add @ and on Destination IPv4 address add 216.239.34.21
One last thing:
Also, you need to click on Edit here, and redirect non www version of your domain to www. Simply click on Edit and check the options which says “Redirect xxxx.com to www.xxxx.com”
I hope that through this article, you will know how to apply the custom domain to the Blogspot.
Related post: How to move contents from Blogspot to WordPress


